
We had three more full days for sightseeing including today and remaining in our list were four "Koyo" destinations, two of which were in Tokyo, one in Kamakura and another in Yoro-Keikoku. In the last 12 days we had visited many "Koyo" destinations and were very satisfied with our experience. We decided to drop one of the "Koyo" destinations so as to have more time exploring Tokyo.
We decided to drop the visit to Kamakura because after comparing the four "Koyo" destinations we felt that Kamakura "koyo" experience would be less of a novelty. Kamakura was a coastal town about 28 km from Yokohama and it offered many temples and shrines so we felt that the Kumakura "Koyo" experience would be very similar to our "Koyo" experience in Kyoto.
We decided to drop the visit to Kamakura because after comparing the four "Koyo" destinations we felt that Kamakura "koyo" experience would be less of a novelty. Kamakura was a coastal town about 28 km from Yokohama and it offered many temples and shrines so we felt that the Kumakura "Koyo" experience would be very similar to our "Koyo" experience in Kyoto.
The revised plan for today was to drive up to Yoro-Keikoku using the Tokyo Bay Aqua Line, after the valley we would drive into Tokyo for the night.
 |
| Route for the day |
Tokyo Bay Aqua Line
From our hotel in Yokohama we drove for about 18 km to the start of the Tokyo Bay Aqua Line on the Kawasaki side. The Aqua Line was a part tunnel and part bridge spanning across Tokyo Bay connecting Kawasaki to Kisarazu.
 |
| Tokyo Bay Aqua Line |
The overall length of the Aqua Line was 15 kilometer. The first portion of the line was an undersea tunnel of 9.6 km and it joined to the second part, a bridge of about 4.4 km long,
Getting into the tunnel was an anti climax. I had this unrealistic expectation where I imagined the tunnel approach to be more dramatic - like the sea rushing toward us as we drove into the tunnel. Unfortunately the experience was just like driving into a road tunnel, one could not even tell that the tunnel was below the water. This tunnel was the fourth-longest underwater tunnel in the world and I thought with Japan's advance engineering technology they would include some creative design like a transparent roof on the approach into the tunnel.
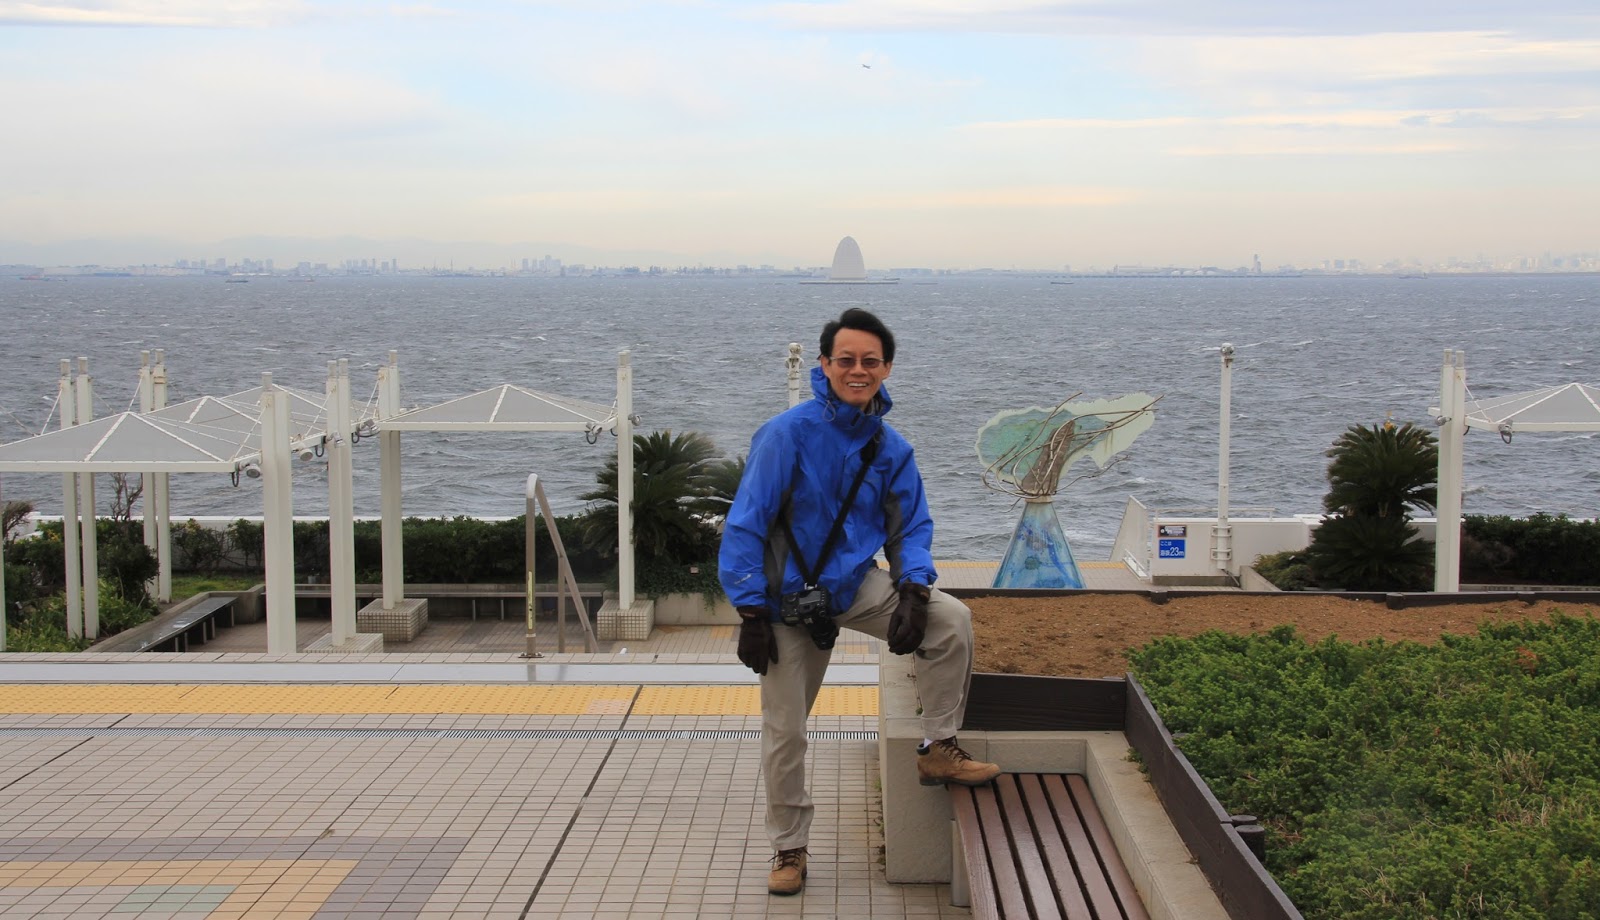
Coming out of the tunnel after driving 9.6 km was a better experience. At the tunnel and bridge crossover point was a artificial island in the middle of the Tokyo Bay. The structures on the island consisted of a complex network of roads and flyovers connecting the artificial island to the bridge and the tunnel and a massive multi level building cum car park. In the building were many restaurants, shops and amusement facilities.
 |
| View on the artificial island looking toward the direction of the Bridge |
We parked our car on a middle deck and walked up to the upper deck. Standing on the upper deck we felt as though we were on a big ship because looking out we only saw the massive sea all around us and felt the continuously gushes of strong wind whipping against our faces.
 |
| On the highest deck of the building |
One end of this artificial island continued onto a bridge joined to a land very far away. The other end faced a huge body of water. We could see the vague outline of buildings on a land very far away. This end was joined to the undersea tunnel and the only indication of the tunnel was a "sail" liked structure on the sea surface directly above the tunnel.
 |
| View of the crossover point - looking toward the direction of the underwater tunnel |
The "sail" liked structure was the Kaze no To, it used the bay's almost constant winds as a power source to supply air into the tunnel.
 |
| Kaze no To |
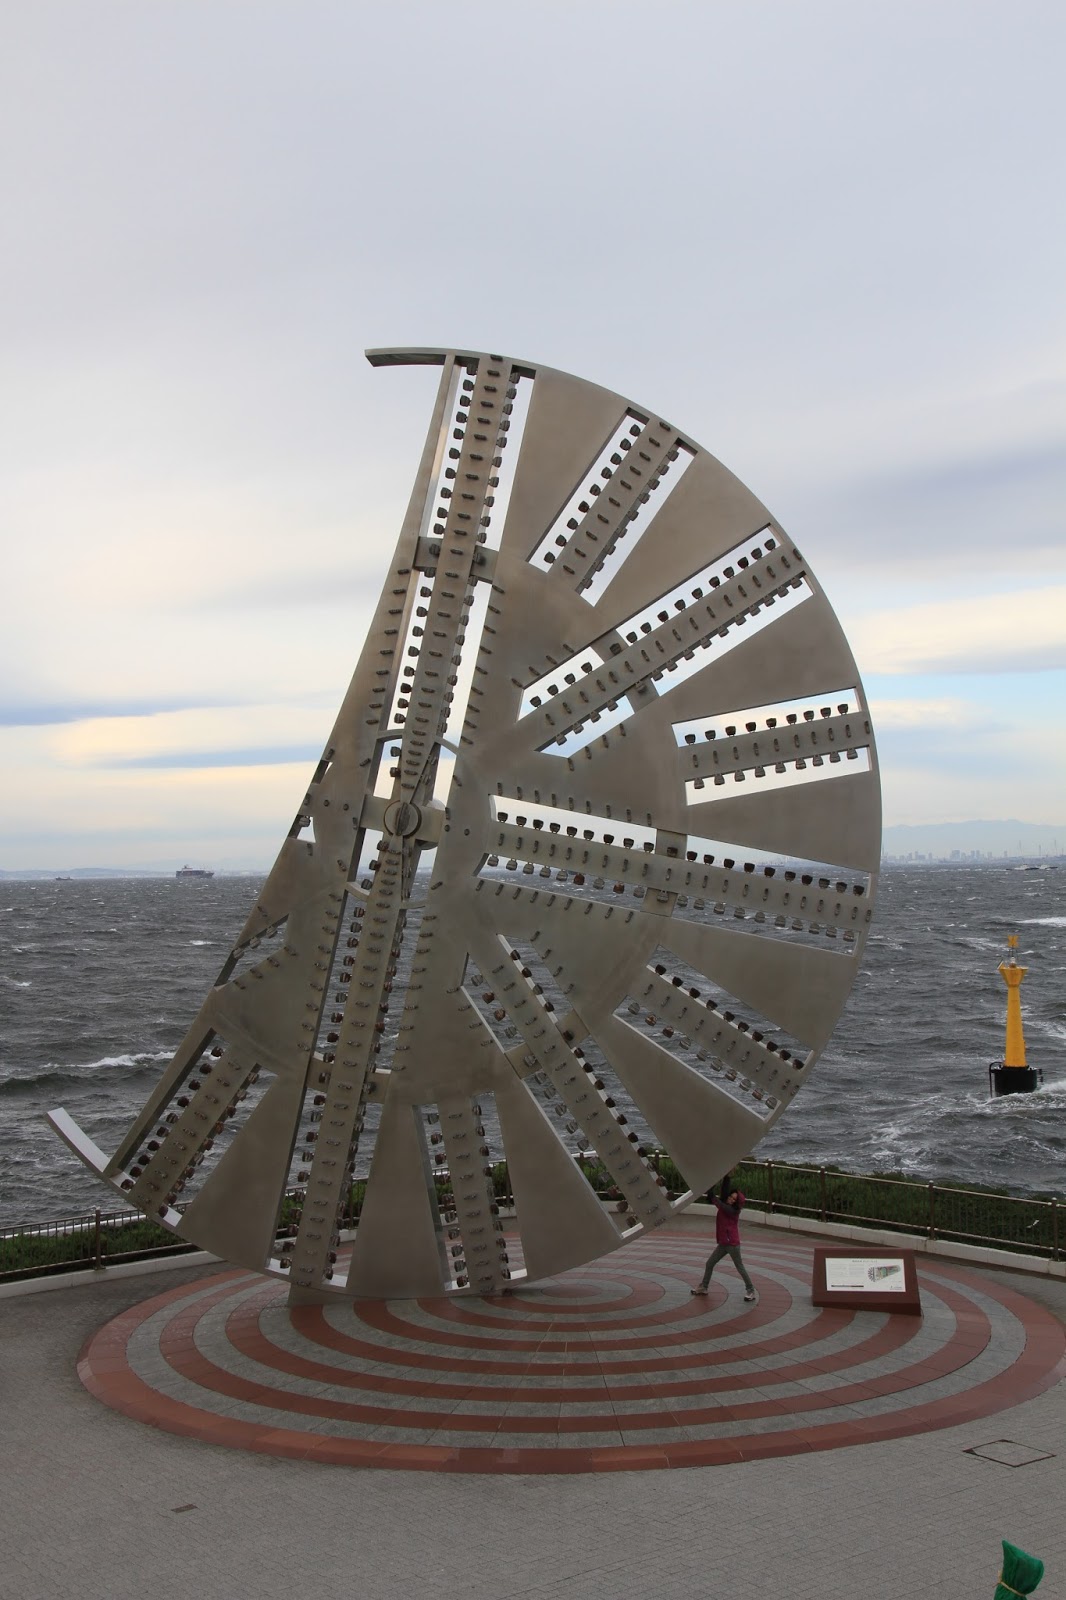
While exploring the artificial land we came upon a interesting humongous half wheel structure. It was made from shining metal.
 |
| Tunnel Coring Machine - cutter |
I went nearer to read the writeup on this huge structure. It was a cutter that was mounted on the coring machine used for digging the tunnel of the Aqua Line!
Wow, the coring machine must be gigantic!
Wow, the coring machine must be gigantic!
Standing beside the "half wheel like" structure which was located near the end of the artificial island, I could feel the roughness of the sea as salt water kept sprinkling down on me. The wind was very strong and at times I could feel myself being pushed about by it. It was truly a great engineering feat to construct this Aqua Line. Now I could understand why it took 23 years of planning and 9 years of construction and cost of 11.2 billion USD to construct this line.
We were glad to have made the stop on this island rather than to drive directly from the tunnel to the bridge. This stop had made our crossing of the Tokyo Bay Aqua Line more interesting and memorable.
Yoro-Keiskoku (Yoro Valley)
The drive from the end of the Tokyo Bay Aqua Line to Yoro-Keikoku (Yoro Valley) was about an hour and the distance 45 km. Yoro-keikoku (養老渓谷) was the valley of Yoro River ( 養老川) located in Boso Peninsula. Along the valley there were several towns/villages with many hotels, hot springs and gift shops.
 |
| route to Yoro Keiskoku |
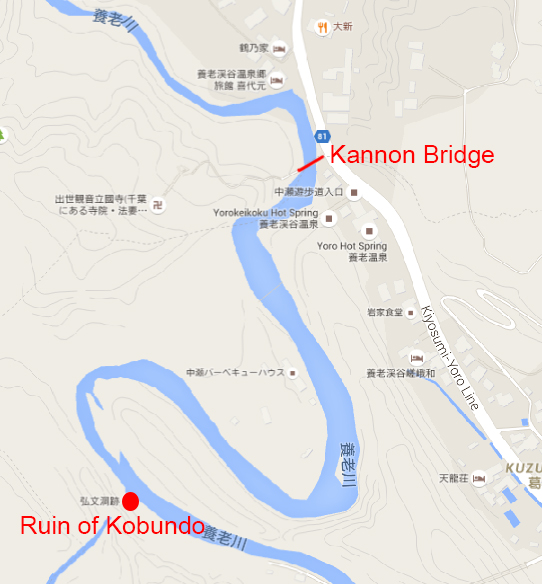
I had read of two popular hiking trails along the Yoro River. One was to the ruins of Kobundo and the other to Awamata Falls. For our visit we planned to walk the trail to Awamata Falls.
Shortly after passing Yoro Keikoku station we stopped the car be the roadside to come down to explore a double arch vermilion bridge called Kannon Bridge (観音橋).
 |
| Kannon Bridge (Mapcode: 130 004 204) |
 |
| route to Ruin of Kobundo |
Kannon Bridge spanned over the Yoro River and led to a temple on the other side of the river. This bridge was about 2 km south of Yoro-Keikoku station and we spotted it while driving on the road.
The bridge looked beautiful against the backdrop of "Koyo" trees. It would be lovelier if Yoro River was not so dry. The ruin of Kobundo was about 1km south of the bridge along the river, but since we decided on trekking to Awamata Falls we did not proceed beyond the bridge.
The ruins of Kobundo used to be a huge tunnel that connected Yuri River to Yoro River. In 1979 the roof of the tunnel collapsed and today visitors see a huge deep valley.
Yoro Valley walk to Awamata Falls
There were two ways to get to Awamata Falls, one was to hike along the walkway on the river bank to the Falls, the other was to drive on the main road to as near the Falls as possible and walked a short distance down to the Falls. Our primary reason for visiting Yoro Keikoku was to see its famous autumm colours so we were here for the hike and the Falls was just a bonus.
I found a spot on the river bank that could be easily accessed from the road and from that spot on the bank would be a 2 km walk to Awamata Falls. This would make a return trip of 4 km. 4 km hike was just nice for us not too long or too short.
We drove south on highway 178 and turned left into a road that led to Suigetsuji 水月寺(buddhist temple). After passing the temple we kept driving westward till the end of the road (Mapcode: 309 801 694).
 |
| Walking Trail to Awamata Falls. Trail start (Mapcode: 309801 694) |
At the side of the road we found a set-in and we parked our car there. Near the end of the road we saw a flight of steps leading down to the valley, we walked down and reached Yoro river bank. There we crossed a narrow bridge to the other side of the river where there was a proper walkway and walked southward towards Awamata Falls.
 |
| Crossing a bridge to the walkway on the western bank of Yoro river |
Yoro valley was ruggedly beautiful. Looking up from the base of the valley to the "Koyo" trees that clung to the sides of the valley, with their yellow, orange and red leaves blanketing the valley cliff was a stunning sight.
 |
| Koyo valley walk toward Awamata Falls |
The walkway following the curves of the Yoro river which was quite curvy. The curves made the walk very interesting as I was always wondering what was ahead of a curve, another beautiful red tree, a drop in depth of the river, another crossing or a huge bird.
 |
| Koyo color of Yoro valley |
Finally we reached Awamata Falls, there were already many people at the Falls. Many of them did not come through the walkway by the river. They came down the valley from the hotels that were built near the Falls or from the main road just above the valley near to the Falls.
 |
| Awamata Falls (Awamata no taki) |
Tokyo
It was close to 4pm when we left Yoro Keikoku for our final destination of the day, Tokyo, where we had booked a room for three nights.
 |
| Route to Tokyo |
There were two ways we could get to Tokyo. One was to back track and used the Tokyo Bay Aqua Line to return to the other side of the bay then travel a short distance northward to Tokyo. Or we could take the coastal roads that looped anticlockwise around Tokyo Bay to reach Tokyo.
We decided to drive on the coastal roads because I thought it would be more interesting to travel through an area that we had not seen before rather than to repeat the landscape we had already seen by backtracking through the Aqua Line.
It was actually a mistake because there was not much scenery beside the usual town and village landscapes. Though the distance was only 90.5 km the entire drive took about two and a quarter hours. Driving through villages and towns was also a bad idea because there were just too many stops (traffic lights) practically every 200 metres. If we had taken the Tokyo Bay Aqua line we would have cut the traveling time by half.
For the next two and a half days we would be in Tokyo and we would explore several of its attractions. Tokyo had a good transport network systems and we could easily get around using the bus, rail and subway systems. Which meant that we would not be needing the car much. Rather than to hold on to our car and parking it at the hotel for the next three nights at ¥2500 a night we decided to return the car once we reached Tokyo.
When we reached our hotel Ginza Creston Hotel Tokyo we dropped our luggage at the reception and drove straight to Nissan Rental Car Outlet at Tokyo Station. After returning our car we took our time looking for a place for dinner. The area around Tokyo Station was a very vibrant place with many high rise shopping malls. There were many restaurants and shops and people all over the place. We went into a busy Ramen place to have our dinner and after that we took the subway back to our hotel.
Ginza Creston Hotel Tokyo
 |
| Ginza Creston Hotel Tokyo |
When we first drove up to Ginza Creston Hotel Tokyo we knew that we had arrived at the right destination (as we could see the twin towers) but we could not seem to locate the hotel. This was because the hotel signage was not as obvious as the "St Luke Garden" signage. We had to drive slowly round the twin towers a second time before we spotted the hotel signage. Apparently Ginza Creston Hotel was on the upper floors of the Ginza Saint Luke Twin Towers also known as St Luke Garden. The hotel reception was on the ground floor of the tower.
The hotel started from the 33rd floor upward and our room was on the 35th floor. Our room was a twin room, it was large, it had a great view of the city and the bay and it even had a massage chair in the room. This place was the best of all the hotels of the entire trip. The cost of the room was ¥10250 a night with ensuite bathroom and no meals.